PDF Files
Having the correct settings when you PDF your files for print can make all the difference! The following instructions show you how to set your Adobe PDF settings for digital print.
PDF stands for Portable Document Format. It is CQ’s preferred way to receive all print files. When your PDF settings are correct it will make your print job run smoother and you’ll receive the finished print run back faster.
Disclaimer: The following PDF settings are the ones we find best for the majority of our print jobs. However, there are always exceptions to the rule! If you need help please contact our production staff.

1. When you save or export your PDF a box will appear on screen with various setting options. In General select High Quality Print from the Adobe PDF Preset dropdown menu. Next select Acrobat 4 (PDF 1.3) in the Compatibility dropdown menu. This is best for transparencies, drop shadows etc.

2. In Marks and Bleeds select Crop Marks under the Marks box and add 4mm to all sides under the Bleed and Slug box. This will ensure the bleed from your file will be visible and trimmed correctly.

3. In Output select No Conversion in the Color Conversion dropdown menu.

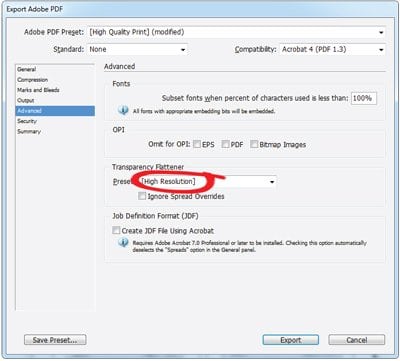
4. In Advanced change the Transparency Flattener setting to High Resolution.